
Painting walls with a sponge is one of the more creative time saving ways to paint your walls, so naturally there are a few best sponge wall painting techniques.
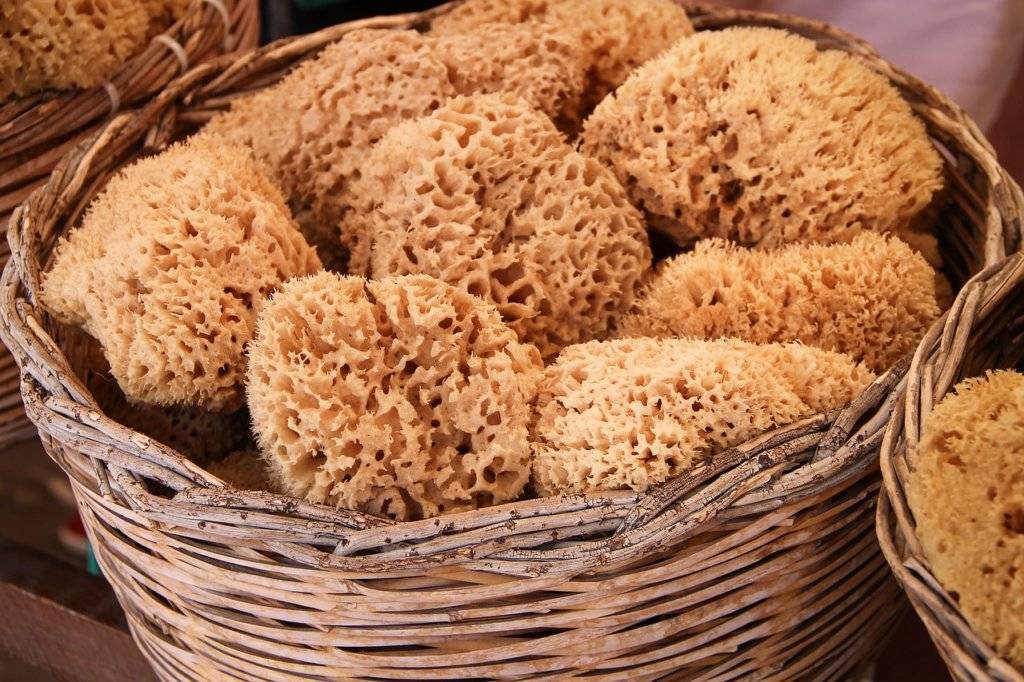
Natural sea sponge
Before you get down to doing your sponge wall painting techniques you have to choose a sponge, naturally the best sponge is the natural sea sponge and it comes in different sizes they range from small to large. The size that you buy will depend on how much area you want to cover but if you do not know what size to go for then just ask at your local hardware store or look online. If you decide to use an old kitchen sponge then make sure its clean because any dirt can ruin your work.
Sponges come in many shapes and colors some even glow under black light! So when choosing which color to use always remember to match your room as well as yourself. You could also try mixing two sponges together like I did here.
The first thing you need to do before starting your sponge wall painting technique is to prepare all your materials this includes:
• A bucket full of water
• Paint brush, for the fine point edging
• Sponge with water
• White primer/paint
• Sandpaper
• Wall paper
• Masking tape
Paint tray
paint roller
• Scissors
glaze mixture
First wash your sponge thoroughly by dipping into the bucket of water until the excess water runs clear. Then squeeze out the extra water and leave to dry. This step is important otherwise the next steps won’t stick properly.
Next take your white primer and apply liberally onto the surface of your chosen wall. Make sure you don’t miss any areas especially around windows and doors. Leave to dry completely.
Once the primer has dried remove the masking tape carefully and start applying the sponge directly over the primed area. Use plenty of pressure while pressing firmly against the wall. Try to avoid getting too close to the edges of the window frames etc.
When finished repeat the process again only now add another coat of white primer. Let dry fully once complete.
Now sand off any rough spots left behind after removing the tape. Also be careful not to scratch through the primer layer.
Finally apply a final coat of white primer leaving no bare patches. Allow to dry overnight.
Apply your favorite wallpaper paste following the instructions provided. Remove the backing paper and smooth out any bubbles. Wait 24 hours for the paste to set up.
Peel away the backing paper and hang your new piece of art. Enjoy.
paint colors
When painting your walls, the paint colors really matter and will make a difference between looking good and being great. There are lots of paints available today including latex, oil based, acrylics, enamel, chalkboard, metallic, matte, gloss, semi-gloss, satin, eggshell, flat finish, high gloss, low sheen, ultra glossy, textured, and more. Each type of paint offers something unique and special. For example, latex paints offer excellent durability and flexibility, whereas oil based paints provide rich texture and depth. Acrylic paints allow you to create beautiful designs without worrying about drying times. Chalk board paints are ideal for kids rooms where safety is paramount. These paints will work well with sponge painting techniques. . These paints will work well with sponge painting techniques. . Metallic paints give a modern feel to any space. Flat finishes are perfect for creating sleek surfaces. Glossy paints are very shiny and reflective. Semi-Gloss paints are slightly less shiny than gloss paints. Satin paints are soft and velvety. Egg shell paints are made from real eggs and therefore contain nutrients and vitamins. Ultra glossy paints are extremely shiny and reflect every ray of sunlight. Textured paints are created by adding tiny particles to the base paint. These particles help prevent glare and reflections. High gloss paints are shinier than regular gloss paints. Low Sheens are softer than normal gloss paints. Matte paints are non-shiny and tend to absorb light rather than reflecting it back. They are often used in bathrooms and kitchens.
Wall paints are usually sold as either one gallon or two quart containers. One gallon contains approximately 1.5 liters which means that each container can cover an average sized room measuring 10 feet x 8 feet at least 3 inches thick. Two quarts equals 0.75 liters which covers roughly 12 square feet. The size of the container depends on how much paint you need. If you have just enough paint for one small decorative room then buy a smaller container. However if you plan to use all the paint inside a large room such as a living room or bedroom then go ahead and purchase a larger container. You may also want to consider purchasing multiple containers so that you always have some handy when needed. Also remember do your base coat first and carefully choose your base color, this is especially important when using multiple colors
Glaze Mixture
The glaze mixture is what gives the final look to your project. It’s basically like putting icing over cake. Glazes come in many different types depending on their purpose. Some glazes are meant to be applied directly onto drywall while others require sanding before applying them. A few examples include:
Sandable – This kind of glazing allows you to apply the glaze right after finishing your basecoat. Afterward, you simply wipe off excess glaze with a damp cloth.
Waterproof – This kind of glaze requires no additional preparation. Simply brush it on top of your finished surface.
Stucco – This kind of glazed needs to be brushed on wet plaster. Once dried, it becomes hard and durable
Epoxy – This kind of glazing should only be applied to freshly painted wood. When cured, they become waterproof and resistant to scratches.
Clear Coat – This kind of glaze should not be mixed with other kinds because it dries clear.
Sealer – This kind of glazer should never be mixed with another kind since it dries opaque.
Primer – This kind of primer must be applied prior to application of any other kind of glaze.
latex glaze – This kind of glaze has been designed specifically for latex paint. It provides extra protection against moisture and stains.
Oil Based Paint Primer – Paint primers are specially formulated products that are added to the paint during manufacturing. They serve several purposes. First, they protect the fresh paint from absorbing dirt and dust. Second, they keep the paint smooth and even. Third, they add shine and luster to the new paint job. Fourth, they reduce the amount of time required to completely cure the paint. Fifth, they improve adhesion between the paint and the substrate. Sixth, they increase resistance to staining. Seventh, they enhance the overall appearance of the paint job. Eighth, they extend the life span of the paint. Ninth, they eliminate the need to repaint whenever there is a change in decorating style. Tenth, they save money by reducing labor costs associated with reworking old jobs. Finally, they ensure that the paint remains flexible and easy to work with.
Latex Paint Primer – A latex paint primer helps to seal the pores of the newly installed paint. In addition, it creates a strong bond between the paint and the underlying material. Latex paint primers are typically water soluble and easily wash away once the paint is fully cured.
Acrylic Paint Primer – An acrylic paint primer seals the pores of the newly applied paint. It also makes the paint easier to clean up. An acrylic paint primer does not affect the performance of the paint.
Sponge Painting Techniques
A natural sponge is a tool that has been around for centuries. Modern sponges were originally designed to clean dishes but now sponges are widely used in various industries ranging from construction to interior design. In fact, there are even specialized sponges for cleaning windows, floors, furniture, etc. Today we will focus on the best sponge wall painting techniques for home improvement projects..
There’s more technique to it than just painting in a random pattern. The painting techniques include:
Sponge Technique – Using a sponge, start out by lightly dabbing the area you wish to paint. Then move down towards the edges until you reach the desired coverage. Next, remove the excess water from the sponge by rubbing against a towel. Finally, repeat these steps until the entire surface is covered.
Rolled Edge Technique – Start by rolling up a piece of paper into a tube shape. Use the rolled edge to gently rub along the surface you wish to paint. Repeat this process until the entire surface is completely coated.
Brush Stroke Technique – To achieve a smooth stroke, begin by brushing the area you wish to cover with a fine bristled brush. Move slowly across the surface until you get close to the edges. Continue moving forward until you’ve reached the desired coverage. Now, take a rag and blot away the excess paint.
Spray Method – Begin by spraying the area you wish to spray with a mist setting. Wait for 30 seconds and continue spraying again. Do this several times until the desired coverage is achieved.
Sprinkle Method – First, sprinkle the area you wish to coat with a little bit of water. Let it sit for 5 minutes and then proceed to spread the remaining amount evenly over the surface.
Dabble Method – With a finger dipped in paint, gently tap the surface you wish to coat. Make sure to keep the tip of your finger perpendicular to the surface.
paint in spots – Paint small areas first before covering them all at once. You can also use different colors or shades of one color to create interesting patterns.
Paint Spots – For an easy way to make some unique designs, simply place dots of paint onto the surface you want to decorate.
Use Sponge Brushes – A good quality sponge brush is essential when applying paints. It allows you to apply multiple coats without having to reposition the brush each time.
Apply Multiple Coats of Paint – Apply two or three layers of paint instead of one layer if you’re looking to add depth to the final product.
You can see some more techniques in this video.