
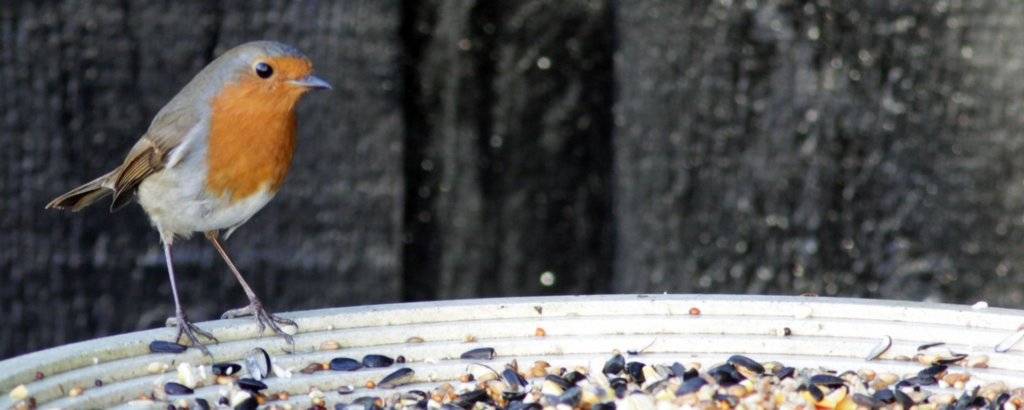
Wanna build some robin bird houses? If, like me, you love to see robins hopping around your garden then what better way to attract them than to build their very own robin bird houses or better yet a whole village of bird houses!
In this brief guide we will explain to you the basics of bird house building and the specifications to attract robins.
Do Robins Use Bird Houses?
Yes they do but only if there are no other suitable nesting sites available, for example if you live ina built up area with scarce trees. But if you have an abundance of trees with plenty of holes for birds to nest in then it’s very unlikely that any would choose to live in a birdhouse.
The best place for a robin to make its home is on a tree branch where it can easily spot predators such as cats and dogs. It also has easy access to food which includes worms, insects and seeds from nearby plants.
How Big Do Robin Bird Houses Need to Be?
The size of the hole needs to be large enough so that the robin can fit through it as if the hole is too small the robin may get stuck inside and die.
A good rule of thumb is about 1 inch diameter at the base of the roof. This should allow the robin to enter without getting trapped. For larger species such as blue tits and great tit’s the hole should be slightly bigger.
Is It OK to Nail a Birdhouse to a Tree?
This depends entirely upon whether the tree is healthy or dead/dyeing. If the tree is alive then yes absolutely nails into the trunk are fine however if the tree is already dying then nailing robin bird houses onto it could cause further damage. So always check first before doing anything.
Where Is The Best Place to Put a Robin Nest Box?
Robin bird houses should ideally be placed high above ground level because this allows the parents to keep watch over the eggs while they hatch. Ideally the nest box should be located between 3-5 metres off the ground.
You don’t want to put it anywhere near windows or doors as these might disturb the parent birds who are trying to protect their young. Also avoid putting the nest box next to a pond or stream as water attracts mosquitoes which carry diseases.
What Kind of Wood Should I Use?
You can use almost any type of timber including pine, cedar, fir etc. However some types of wood are more prone to rotting than others. Pine tends to rot quickly whereas oak lasts longer. Oak is also easier to work with than pine.
Cedar is another popular choice although it requires regular maintenance due to being susceptible to mould growth. Fir is often used by builders as it doesn’t require much maintenance and is relatively cheap.
Should My Birdhouse Be Painted?
Paintings help prevent rainwater seeping into the interior of the birdhouse and causing dampness. Painting helps deter squirrels and mice from entering the robin birdhouses. Some people prefer to paint their birdhouses white whilst others go for bright colours. Whichever colour you decide to use just remember to apply two coats of varnish after painting.
Can I Add Decorations to My Birdhouse?
Decorations like flowers, twigs, leaves and feathers all look nice but they aren’t necessary. They’re mainly decorative items designed to attract attention rather than provide shelter for the birds. Adding them to your birdhouse won’t harm the birds though.
How to Build Your Robin Bird House: Step by Step
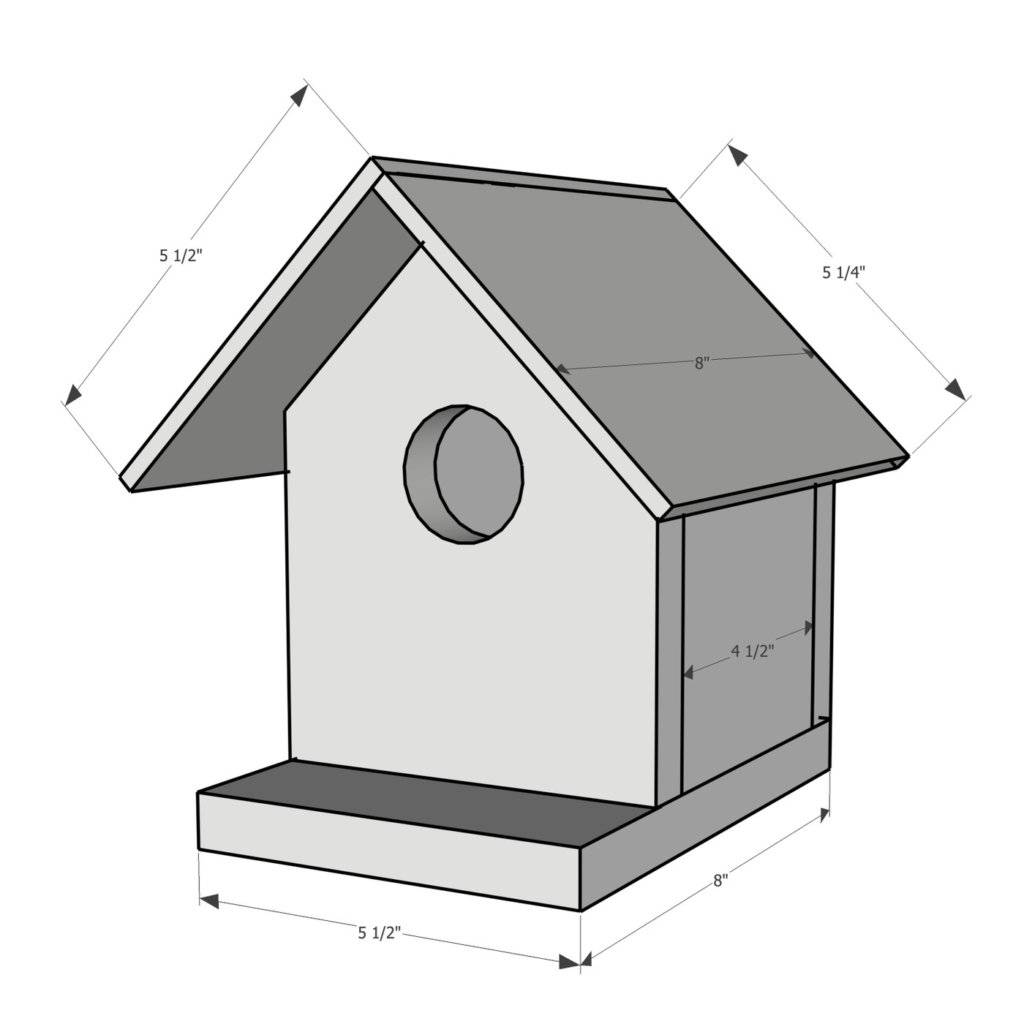
1) First cut out the floor, roof and 4 sides of the bird house using either a jigsaw or circular saw. Make sure you leave yourself extra room around the edges of the birdhouse so that you can nail it securely to the tree. Then sand down the edges of each piece of your bird house.
2) Secondly to make the entrance hole in your birdhouse take your front wall and place it on your workbench then use a circular power drill bit in the centre but right at the top, making the entrance at least 1″ and then sanding down the edges of this hole both inside and out until there are no more splinters.
3) Then glue your bird house together by placing one piece on to the other and either holding it in place or propping it in place until the glue has dried and then repeating this process until the whole thing has been assembled, but not including half of your roof as this is where the hinged door will be.
Once glued make sure everything fits snugly together otherwise there’ll be gaps where the pieces meet.
4) Next drill holes in each corner of the bird house on the back wall section and at the edges where you left extra length in step 1. These holes need to be big enough to accommodate screws or nails for the final step in todays guide.
5) Next drill holes along each side of the roof where you plan to attach the hinges. Drill 2mm deep holes spaced 5cm apart, two holes per hinge. These holes need to be drilled carefully otherwise the hinge screws will split the wood
6) Once you have finished drilling make sure you clean up the area thoroughly and you cover up the screw heads with washers. Don’t forget to remove any splinters left behind and make sure you countersink the holes well otherwise the screw heads will protrude above the surface of the wood.
7) Then add the roofing material. Cut out a piece big enough to fit snugly inside the birdhouse. Then fold the felt paper accordion style until it fits perfectly inside the birdhouse. The best thing about felt paper is that it’s waterproof and therefore prevents moisture getting inside the birdhouse. It also looks great too!
8) To attach the hinges simply drive one end of the hinge through both sides of the birdhouse and then tighten down the other half of the hinge.
If you’ve done everything correctly there shouldn’t be any gaps visible once the door has been closed. When you attach the hinges position them at an angle such that the door opens away from the tree. This way the opening isn’t blocked by branches and makes access easy for the birds.
9) After completing step 8 we recommend adding a small amount of glue to the bottom edge of the door before closing it. Glue ensures that the door stays shut tightly and stops it rattling against the frame.
10) Finally add the roofing to your bird house by gluing the felt paper onto the outside of the birdhouse. You may find it easier if you start by attaching the first few sheets of felt paper then move onto the next ones.
Be careful not to overdo it though because you don’t want the felt paper to become too thick. Also try to keep the felt paper flat while applying pressure to ensure that all areas get covered evenly. This will completely waterproof your bird house and protect your robins from the elements.
11) When you’re happy with the way the birdhouse looks then apply a coat of gloss varnish wait for this coat to dry, then do one more coat.
12) Once your bird house is all dry then its time to nail or screw it to your tree. Ideally 3-5 meters above ground level is desirable but beggars cannot be choosers unfortunately. So grab a ladder, hammer and your level and get up that tree.
I hope my guide on how to build robin houses has helped you in some degree. In conclusion if you live in a built up area robin houses and bird houses of any kind are great for the local ecosystem and id also suggest bug hotels, compost piles, bee baths & bird baths to give your local mammal and insect species a helping hand.
If you would like to learn more about robins then click here for an informative YouTube video.