

Cane Bottom Chairs Repair is a pretty straightforward process when you know what you’re doing.
Introduction
Caning is an old method of making furniture that appears in ancient Egypt, so old is the method. While its a bit difficult, and takes some patience, cane bottom chair repair is certainly able to be learned and worth your time in the money it will save to repair those antique chairs you come across for the perfect price. Wicker furniture is notoriously expensive and learning this skill will be well worth your time in just what it will save you in repair bills alone for your furniture items.
Materials Needed to Repair Cane Chairs
- press in cane webbing that is pre-woven;
- wood glue
- spline of correct size
- clean rag or old towel
- hot water with some vinegar added
- an eyedropper; a utility knife
- a wooden wedge (this usually comes with your order of cane webbing ) an eighth of an inch wood chisel and plenty of patience.
- A screwdriver, tack hammer and pliers are also handy.
Types of Caning
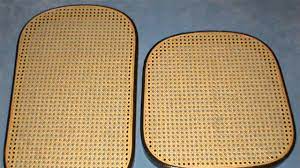
Cane chair seats come in two types, one uses pre-woven, press-in cane that sits in a groove and is held in place by wood glue and spline. The other is woven layer by layer and requires a lot more time and skill to finish. It is best to start by examining the chair caning you are planning on working on and determining what needs to be done first.
With most chairs that use the pre-woven cane, the repairs are not as hard, usually it involves the seat of the bentwood rockers or the backs of dining room chairs. For this example, we will use the bentwood rocker seat that I picked up at a flea market, but the techniques will work with any rush seats that requires press-in caning.
First, examine the chair to see if there are structural areas that need repair on the frame. If so, then either find someone to repair it or if you have the skills, repair it before you continue. This is also a good time to refinish or re-stain the chair if needed.
If the chair has a removable seat, remove the seat. Bentwood rockers have a bolt that attaches them to the frame on either side. Remove the bolts and keep the washers and nuts together so they don’t get lost until you need them again. A small plastic bag is great for keeping these in.
Cane Bottom Chairs Repair: Step-by-Step

Cane is a type of grass and is very brittle when dry. It is similar to reed in the fact that you have to work with it while it is wet, but if you follow the steps below you shou
ldn’t have any issues
- The first step is to carefully cut the cane out, leaving about two inches between your cut and the frame. This helps you keep control of it better.
- Now for the removal of the spline. Start where the spline is spliced together, using the eyedropper to place water on top of the spline. Wipe any that drains off, it is a good idea to do this on a table or some other solid surface with a towel or two underneath.
- As the spline softens and can be pulled loose, carefully loosen it by adding more hot water. It will take time but when the glue loosens, the cane will come with it. After the spline and cane is removed, scrape the sides and bottom of the groove clean and make sure no glue or small pieces of cane remain. Let the chair dry for several hours to make sure the glue and spline will hold when you replace it.
- Soak the cane webbing in warm water for about 15 minutes, then shake the excess water off. Soak the spline for a few minutes so it becomes pliable. Place the cane, shiny side up, over the opening in the seat.
- Using the wedge, gently tap in the cane in, starting with the back of the seat. Tap in about an inch or two, then do the same with the front and sides. It is important to make sure there is enough give in the cane while you are working it. Cane shrinks as it dries and cane split the chair if you do not allow an inch or so of room in the center of the webbing. Continue to gently tap the cane into the groove, then add a thin bead of wood glue and finally the spline, tapping it into place. Cover the seat with a damp washcloth or towel while it dries to prevent it drying too fast.
- Set the seat aside to dry for 24 hours, then trim the excess cane from the seat, reassemble the seat in the frame. Pick up a magazine, fix a favorite beverage and sit down, you’ve earned a break.